10A Modelling

Modelled Drum Sounds

OK, so last time we looked at sampling. How does all this differ to modelling? Well, lets have a look;

The idea of physical sound modelling has been around since the early 1970's. The principal is very simple – any sound can be approximated by adding other sounds (or waveforms) together. The more sounds you add together, the more complex and (if the individual sounds/waveforms are correct) realistic is the final result.

Take a drum. If you could isolate the sound of the top head, the bottom head, the shell, the room and any other factor (snare wires etc) and put them back together, you'd have a very good representation of the original drum sound. 

Physical modelling also works around strict rules. We know that a drum sound decays (or gets quieter) after it is hit, so all parts of a drum sound must get quieter over time. Top head hits also get darker as the impact of the stick loses energy (or, to recreate that, have a filter sweep on them), but bottom heads don't to the same degree (although they don't have the stick attack that the top head does...). Maybe a birch shell resonates for a shorter amount of time than a maple shell. Maybe a birch shell's sound has less mid range frequencies. All these factors (and loads, loads more) must be taken into account for a truly accurate sound to be reproduced. So modelling predicts what a sound will be like by using information it knows and assumptions it takes. 

To make each separate part of each sound or waveform, synthesis is used. This means the correct waveforms are created in a synthesizer program in a computer, are mixed together and (hopefully) sound like the sound you were hoping for.

Now is a good time to mention that if you have a modelling module and you see 'Bubinga tom' or 'Maple snare', you aren't actually getting the sound of that drum. When the manufacturers create the sounds for a modelled module, they sample sounds (which is where the confusion comes from about modelled modules containing samples), and then the sample is forensically analysed by human ear and computer to work out the best way of recreating it, but (generally) none of the original source sound is used in the modelled one.

So what you are getting is a computers most accurate and processor-effective way of recreating that sound by adding (essentially) sine waves together in exactly the right proportions, and adhering to the strict rules of what makes a drum sound like a drum.

Many modelling systems use around eight layers, or elements, to recreate each drum sound – the top head fundamental pitch, the top head main overtone and secondary overtone, the bottom head fundamental and overtone pitch, the shell sound etc etc. Added to this is snare buzz if required, room sound and anything else which is deemed essential. Put it all in the mix and Voila... your unique drum sound.


Add to that some EQ and theoretically you have the most flexible drum sound in the world. If you want to hear what the raw modelled sound is really like, just turn off the reverb, and any 'additions' 

So in your modelled module is a reference bank of modelled waveforms (but not audio samples) which the module draws from to create whatever sound is required. Using lots of clever maths, the waveforms are mixed together to create the required sound.

If you really want to look more into this, I really recommend this work from Stanford University (who incidentally worked with Yamaha to develop the original instrument modelling data for the first modelling synthesizer, the VL1 in1994)

https://ccrma.stanford.edu/~jos/pasp/

What makes one better than the other?

Now what makes modelling very good is that it is very easy to alter the sound without distorting it. Want to detune the bottom head? Easy - just turn down the pitch of the bottom head fundamental and overtone. Want to pitch the whole drum sound up? Easy - just turn up the pitch of all tuned elements (top head and bottom head frequencies). Make the drum bigger? Pitch down the shell element and head pitches proportionally. And all this you can't do on a sample.

If you try and pitch a sample up too high or too low, you can get 'aliasing' where unwanted elements appear in the sound and it begins to sound fake (think of the chipmunk effect if you pitch your voice up). Aliasing is also what makes low res MP3s and YouTube videos sound rubbish and 'phasey'. What samples are excellent for are recreating a perfect moment in time when the original drum that was sampled sounded fantastic in the studio. Its why one current drum module doesn't allow you to change the pitch of the sounds – to do so would add aliasing to the sound (albeit very subtly) and this would compromise the sound quality.

However, modelling is far from perfect too – if modelling WAS perfect we'd hear it on every single record in the charts and everybody would gig electronic kits... and we all know that doesn't happen. 

This is because modelling is never 100% accurate. This is because to make a 100% accurate drum sound would require an infinite amount of layers or elements. When all modelling modules use a minute percentage of that (can you even have a percentage of infinity?), then it will never reach perfection. 

To my ears (and I'm going to lay my position on the table here), modelling has a distinctive sound when it is recreating acoustic drum sounds, which is very recognisable if you know what you are listening for. It is also 'too good', in other words it sounds too clean and perfect. A digital recording or sample of a drum can capture the imperfect sound of the badly built American classic tom with the dodgy gum ply in the middle of the shell and the loose lug on the bottom head, which is what gives that particular drum its character. And that is exactly what I think is missing in modelled sounds – character – and until there is a 'character' knob to turn up on a modelled module (which lets face it may be just around the corner), it isn't for me.

But modelling is perfect for making elastic drum sounds which can be tuned up, down, stretched in impossible (in the real world) ways for unique drum sounds. Swedish Death Metal would be rather different without modelled drum sounds as they are perfect for that style of music – clinical, perfect, cutting. Modelling is also (weirdly) perfect for recreating electronic sounds which were synthesised in the first place. A model of an 808 cowbell is always much nicer and more useable than an original 808. I know some will find that sacrilegious, but sorry, thats how I feel! 

The other strange thing about modelling and sampling is they sound totally different when they are by themselves to when they are being played with other instruments. I've heard (very obvious samples) which didn't sound great when they were solo'ed, but sounded great in the mix, and I've heard modelled sounds which sounded fine by themselves but suddenly sounded fake when they were played with acoustic instruments. It's weird how the human ear picks up different things in different situations.

So thats our two main sound creation methods. Neither are perfect – both have limitations, and both change the sound in ways which can easily be noticed if you know what you are listening for. But we rely on these methods for our edrums. However, depending on what style of music you play, you might want to look at which method will serve you better for the sounds you need to do your job well.

Simon Edgoose

10 Sampling / Modelling

Ah, the first of probably a few contentious subjects...!

So, you know that lovely electronic kit you own? How are those sounds made? How do they come to be penetrating your eardrums everytime you hit a pad? How are they squashed into the drum module?

Well, over the next two articles we are going to look at the two main methods for creating those lovely drum sounds that we listen to everyday. I'm going to simplify bits so we don't get too bogged down in technical detail, and if you dispute what I'm saying, I'll put some links in to different articles and papers.

So, why is this contentious? Weeeeell... one of the methods is used by 90% of edrum makers, software companies and the like, while the other method... is used by pretty much just one company. And being good business men, everyone likes to think that their method is the best, most accurate method for recreating drum sounds. This has somewhat polarised the market, even though there are quite a few users of modelling, but they use it in addition to sampling, rather than as the main form of sound reproduction (but more of that next time). 

I'm not trying to say one way is better than the other, but what I do want to do is explain roughly how each work, and then you can go out, try everything and decide which works for you, and what sounds good for the style of music you play. There is a LOT of wrong information out there so I thought I'd add more wrong information to the pile... only joking!

So, what are these two methods? Well, sampling, and modelling. You've probably heard of both, and if you are like 90% of people I talk to, you wont really know the differences. So lets look at each and try and make it as clear as possible.

So, to go back to basics, when you hit a drum pad, the module uses a microprocessor (mini computer) to play back the correct sound for that pad and that hit. But what we are talking about here is how the microprocessor stores or makes the sound that you hear. And that is the main difference here – one method plays back a stored sound, the other method creates the sound you are expecting on demand.

As these are quite long subjects, this time we'll look at sampling and we'll look at modelling next time.

Sampling

So sampling is the method we are all most familiar with – we use it everyday in ways we don't really realise. For instance, when you listened to that track on your phone in the car earlier, that was (to all intents and purposes) a sample. It was a digital recording of the music and it was played back, on demand, when you touched the screen of your phone. 

This is no different from you hitting a pad (the same as your touching your phone screen) and it playing back a Black Beauty sample (or Justin Beiber's Greatest Hit in the case of your phone – don't worry, your secret is safe with me).

Sampling has been around for years and years (and the first sampled drum machine, the Linn LM-1 was released in 1980) and it hasn't really changed, except in quality. These day, most samples are what's called 16 bit, 44.1kHz or 24bit, 96kHz. That means that the computer or sampler that recorded the sound (Justin Beiber or your Black Beauty sample) took 44,100 or 96,000 'slices' of the sound per second and stored the information. Each 'slice' says how high the waveform of the music was at that precise point, and by replaying the 'slices' back in the correct order, and at the right speed, the waveform of the music can be rebuilt and replayed into your ears.

As those bits are binary (1's or 0's) a single 'slice' could look like this in the case of a 16bit sample; 

1011010001010011

So if you imagine 44,100 times that much information, that is how much data a sampler stores for every second of sound. If you think that is quite mind-blowing, welcome to the club! 

(As a bit of a nerd experiment, I just got a program to randomly generate 44,100 pieces of 16bit data and it filled 1193 pages of A4. That is a LOT of data and that is for EVERY SECOND of a recorded sound at high quality! Obviously your phone stores data at a lower quality but thats still a load of data for each Beiber track)

Plus, the more slices that are taken per second (96,000 rather than 44,100 for instance), means an even more accurate recreation of the sound, but it also needs much more storage space so there is often a compromise.

But more slices per second isn't necessarily 'better', and that depends on what you want to do with the sound. If I want to use a drum loop in a track, I often find that a 16 or 24 bit sample takes up too much 'sonic space' if I keep it at high quality, whereas an 8bit or 12 bit sample from a late 80's drum machine sits in the track much better and is less intrusive into the whole sound.

So, we know that sampling uses a lot of space (which is why it can be expensive as it needs lots of storage), but the clever bit comes when the edrum makers or the sample house (a company who just make samples) put the samples back together again.

To make the sampled sound more realistic, makers use a load of tricks;

  1. Multi layer samples – rather than just one sample per hit, there may be 100+ samples to cover all the volume levels from the lightest hit, to the loudest hit. This stops the sound being the same regardless of how hard you hit the pad. It adds a degree of realism (after all, a snare doesn't just sound louder when you hit it harder, it has more harmonics/overtones, more buzz etc)

  2. Round Robins – rather than just one sound for each volume layer, there may be multiple sounds for each layer so there is always a new sound being played, even if you play exactly the same volume over and over. If the same sound is played repeatedly, it often results in 'machine gunning' where the sound sounds unnatural and stuttering...

  3. … so there are often Anti Machine Gunning aids – to further stop the machine gunning, some makers slow the start of the sound to make it smoother, but only when the sound is repeatedly played fast.

So sampling works by playing back many different recorded sounds in a way which to our ears sounds like the original instrument. It is relatively simple but needs a fair bit of storage to hold all the thousands of individual samples, and requires a lot of programming to make it as realistic as possible.

So that's sampling in a nutshell (it's actually quite a bit more involved when you get into the delights of crossfading without phase issues and the like but we'll forget that for the moment), so thats it for this time. And lets look at modelling next time. If you have any questions, as usual, please get hold of me on simon@edruminfo.com

Simon Edgoose

09 Crosstalk Rejection

Ok, so its not what I said we'd look at this time, but in the last few days a crosstalk issue cropped up with someone who got hold of me through the site for advice, so I though it would be fitting to have a look at it. 

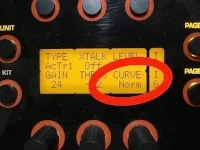
So Crosstalk Rejection (or Crosstalk, or Xtalk, or SpRej) is another thing you'll have probably seen on the screen of your module and (like most people) wont really understand what it really does. However, this is the one parameter that seems to get people wrapped up in problems faster than any other.

Does this situation sound familiar - you hit two or more pads, say kick, snare and crash, all at the same time, and one of them, lets say the crash doesn't make a sound? You hit the crash pad by itself and it works fine, but occasionally, when you hit all three, it doesn't. Weird! 

This is caused by having the Crosstalk Rejection set too high. 

But what is Crosstalk? Well, if you have two pads on the same stand and you hit one hard, the impact vibrations travel through the stand and are large enough to make the other pad (the one that hasn't been hit) play as well. That could be an issue if one pad has a nice delicate bell-tree sample on it, and the other a nasty, vicious China sample. So this unwanted triggering caused by stray vibrations is Crosstalk. And Crosstalk Rejection is the parameter used to get around any crosstalk issues.

Now, before we go any further, I should point out that if you have your Gain and Threshold correctly, you (generally) shouldn't need to use your Crosstalk Rejection settings – in my experience 99% of problems can be circumvented by tweaking the Gain and Threshold. However, there's always the odd occasion when nothing else can be done and you need to get in a little deeper.

If you do have a crosstalk issue (and you are sure your Gain and Threshold are correctly set), then there are a few things I would recommend before you start tweaking the Crosstalk parameters;

Firstly, try and separate the pads so they aren't on the same stand or rack. If this isn't practical try tightening or loosening the mounting bracket, so the vibration path (the route of the vibration through the stand) is changed slightly different. This could be enough to stop it.

Secondly, if the above didn't work, try a different style/make of pad, or use a pad which has built in suspension, like the Dauz pads or the Yamaha XP80, 100 or 120 pads.

So assuming these options don't work, and as a very last resort, try raising the threshold of the pads which are having the issues (the ones which are being set off accidentally) until it stops. Then play the pads you just raised the threshold on and see if they are now unusable in the way you want them to work (ie do they work correctly on all the tracks you need them for?). If this does work, then what I said above applies – adjusting the Threshold works in 99% of cases! If they don't work as you want (ie they are not sensitive enough now), then put the threshold back to where it was (you did make a note of it didn't you?). Then go to the Crosstalk Rejection page.

So what the actual Crosstalk Rejection does is it listens to the inputs and compares them, and if it thinks that one of the signals is close enough to another and might have been caused by vibration, it will stop that pad from making a sound, if it is lower than the level which you set. You can obviously choose which pads it looks more closely at – you can normally find a setting/grid which says something like “Reject vibration from pads 3, 4, 7 and 8” or something like that.

So say you hit your Tom 1 pad and Tom 2 plays as well, then you go into the Tom 2 channel and (depending on the make of your module) tell it to ignore any triggers on the Tom 2 channel that happen at the same time as the hits on Tom 1, if they are quieter than the amount of Crosstalk Rejection you dial in.

But, and this is another reason to avoid using Crosstalk Rejection at any cost, Crosstalk Rejection costs you time. And what I mean by this is that to work correctly, the module needs to compare input signals and work out what got hit when and if it could be caused by crosstalk. This takes time, albeit milliseconds, but if you module boasts about its amazingly fast response, then by using Crosstalk Rejection, you are seriously degrading the response time of your module (if your module generally works quicker than 5ms and the input rejection comparison adds another 1ms, then your system has just slowed down by 20%).

When tweaking Crosstalk Rejection, the best rule of thumb is to go slowly. Don't feel tempted to whack it all up as you'll get the sort of problems we talked about at the top when rather than firing without you hitting them, some pads might not fire at all when you hit them at the same time as other pads. So just go slowly and nudge up the Crosstalk Rejection setting a little at a time until the system performs better. You can always go back if you do too much.

If you do find yourself on stage with a seriously misbehaving system (we've all been there), having adjusted the Crosstalk Rejection too high, then there is one bit of advice I can give – start to play sloppily. If the system is expecting pads to be hit at the same time (and its cancelling some of those that are being hit), then by playing open flams (both hands not playing at exactly the same time), you might get just away with it. At times like this you just have to ask yourself – what sounds better – playing like I'm drunk but hearing all the correct sounds, or playing really tightly and missing important samples?

One last thought is that sometimes you might not want to use Crosstalk Rejection, especially if you are triggering more natural, acoustic sounds. This is because acoustic drum kits have naturally terrible crosstalk - if you hit your acoustic bass drum hard, then the toms ring and the snare buzzes. This is natural crosstalk and we take it for granted. It even makes the kit sound more natural, or 'real'. 

If you want to try this 'natural crosstalk' on your electronic kit, just lower your thresholds enough (or turn them off completely), and you can get it to behave in a very similar way. However (and this is very important), while it might make the kit sound slightly more realistic when set up correctly, it seriously kills your polyphony (remember the last article?). Your polyphony could easily drop from 64 notes to 8 notes or less (as your one bass drum hit is also causing your toms and snare to trigger too), so be careful. I wouldn't recommend gigging with a 'all thresholds off' system, but its interesting to try once(!).

As with all these thing, there are little tricks you learn as you go along which can really help. The more time you spend with a particular kit, the more ways you learn of getting out of problems, and the more you can recognise problematic situations before they become an issue. With electronics, every day is a school day.

And people think this electronic percussion thing is easy, huh?

Simon Edgoose

08 Handling Rejection Time

Ok, so time for another setting you might have seen inside you module that you might not be 100% clear about. Lets look at Reject Time.

Lets imagine you put a trigger on an acoustic drum. And lets say (just for fun) its a big, low tuned 16” tom. Now, lets say that you dont change anything inside the module, and you hit the tom. What happens next? What sound comes out of the module? Well, probably, it will go “BRRRRRRRrrrrrrrrrrrrrrrrooooom...” rather than the nice big “Boom” you were expecting. Why on earth is that happening?

Well, its quite simple. If you recorded the sound of your ringy 16” tom and put the recording on a screen, you'll probably see something like this;

Screen Shot 2018-04-27 at 15.56.07.png

And in that picture you can see the waveform going up and down (about 70 times a second if you can see the time scale at the top of the picture) and gradually dying away.

So, what your module hears when you hit that tom ONCE is you hitting the tom 70 times a second as it sees every time the waveform line goes up as a new trigger. It doesn't know whether you have hit it once or seventy time, it just reacts to what is coming in to the pad input channel. So, we have to help it.

(If you read the last article about Polyphony, you'll also hopefully realise that those 70 notes that the module thinks you have just hit have also just killed your polyphony stone dead – not good)

We know that the threshold removes a lot of problems for us. Simply put, when the trigger signal drops under the threshold level, it is ignored. But when the trigger signal is above it, the module assumes that every waveform rise (where the waveform goes us) is a new trigger signal.

But its not quite that simple. The module will only think a wobbly waveform is a new signal if the rate of rise (ie the angle of the 'up') is steep enough. By the time the signal has died a way a bit, the angle of the ups and downs is quite a bit softer so the module ignores those.

So what do we do? The tom is generating lots of 'hits' which gradually die away, and we dont want those to trigger the sound again as it will be an audio mess.

So we use the Reject Time parameter. Reject Time (or Mask Time as it is also called) turns the input off after it has received a trigger input, to allow for the vibrations to (hopefully) calm down a bit, prevent miss-trigger, and so make the module's job a bit easier.

We measure the Reject/Mask Time in milliseconds (ms) as in the real world, its only the first little bit of the low, wobbly tom sound that is the most confusing for the module. After that, hopefully the waveform has died down enough for the module to ignore the waveform rises, or it has dropped below the threshold level.

So is it as simple as that? Well, no, not really. You have to have a rough idea about how fast you will play to get the best out of it. Say you are a double bass drum pedal player and you play a lot of 16th notes on the bass drum(s). If you play at 120bpm, then each 16th note takes just over 31ms before the next one comes along. So if you don't play above 120bpm, you could comfortably set your reject time to 30ms and you wouldn't miss a beat.

If you play at (more realistically) 240bpm, then you would have to set your reject time to 15ms (if you were hyper accurate) or, say, 10ms to allow for 'drift' in timing, assuming you play a lot of 16th notes, but 16th notes at 240bpm is the stuff of heroes (or idiots, depending on your standpoint).

The same with toms – 16ths note at 240bpm and you should aim for a Reject Time of 15ms or less. But again, that is high on the scale of 'Help, my arms are melting' so more realistically, if you're in a function band and the fastest track you play is 180bpm (still pretty fast) you should be fine with a Reject Time of 22ms on all drums... except the snare.

On the Reject Time front, the snare is a complete pain. On one hand, you mostly play backbeats which are easy to trigger from, but we also play loads of ghost noters and buzzes, so its a bit of a triggering nightmare. This is where, in most cases, triggering off a snare is a compromise.

To get good triggering performance off a snare, it may be better to dampen the snare more than you usually would. This takes the processing power off the module, but it may spoil your acoustic snare sound.

The other option is to trigger only on the backbeats (raise the threshold to do this, and choose a velocity curve so that the back beats triggers gradually fade in, rather than suddenly go 'BANG'). This lets you keep your nice acoustic snare sound but doesn't trigger so noticeably on the ghost notes.

But there is a trick which I have been using for years (well, about 15, since doing a tour where everything was triggered off my acoustic kit) which can help. I call it the MoonGel trick, and its great if you are having a bit of a nightmare triggering your snare.

If you squash a small (½ or ¼) piece of Moongel (other dampening materials are available!) between the head and the sensor of the trigger, a very useful thing happens. Hopefully that small amount of Moongel wont change the snare sound TOO much, but what is does do is act like a natural noisegate – only definite hits on the head will be big enough to create a trigger signal. All other vibration in the head will be absorbed by the MoonGel or the angle of the waveform is slowed down so much that the module ignores it.

You will have to reset you Gain, Threshold and Curve setting but it can be a real 'Get Out Of Jail Free' lifesaver sometimes. A couple of manufacturers have tried similar things in the past, but the best thing about my suggestion is that you don't have to buy new triggers and most drummers have some Moongel kicking about somewhere.

Simon


07 Polyphony

Okay, so here's our next subject – polyphony.

audience-1850119_960_720.jpg

So what on earth is polyphony? Well, it comes from two Greek words, 'poly' meaning 'many', and, 'phony', meaning notes, and for us drummers it just means how many notes can your drum module play at the same time.

If you think about it, your acoustic drum kit has unlimited polyphony. You can hit every drum and cymbal as fast as you want, and as many times as you want, and nothing strange will happen - you'll hear everything and everything will ring until all the vibrations of stopped. The same cannot be said for a electronic drum kit.

All electronic drum kits have a processor of some sorts controlling the playback of sounds, all your settings and parameters, and everything else associated with making it sound vaguely like a drum kit. Now all processors have a limit to how much they can process at the same time. On electronic drum kits, processing limits regulates how many notes your drum kit can play at the same time without there being any problems.

So maybe your electronic drum kit has 64 notes of polyphony. That means you can play 64 different hits and each one of them will sustain for as long as it is required to do, but as soon as you play a 65th note, (usually) the very first note that you played will stop (this is called 'note stealing'). In most situations, this really isn't a problem as by the time you get to note 65, the first note you played will have died away and cannot be heard.

However, if that first night you played was a drum loop and it's looping round and round, and you are busily playing over the top with long sounds, then you may be in for a surprise. If your first note was the loop, and notes 2 - 64 are long samples (such as cymbals and ringy toms) and you hit another note on top there is a good chance that your lovely, grooving, drum loop will stop. This could be quite embarrassing if it happens in front of a large audience.

Of course, this doesn't often happen as we don't generally play 64 notes of long ringing sounds such as ride cymbals (or do we?). However, how long does it REALLY take to play 64 notes? Well, if I play a nice, clean, fast buzz roll, then I can hit 64 notes in a little under 2¼ seconds (I just checked with a Keith McMillen Bop Pad into Garageband if you want to know). And that is without using long samples. So if I were to start a gig with a drum loop and then do a buzz roll, I'd probably be in trouble.

So what, you're thinking, I've never heard of this happening. Well, last summer I had a call from a friend/client of mine who had this exact problem. He was triggering a backing track off a (well known) sample pad device, and playing a groove over the top on the same device. Normally he played a simple eighth note groove, but he was doing a festival and was enjoying himself in front of a lot of people, so he flung in a few extra 16th note hi hat bursts that he didn't usually play... and you can guess the rest.

So I looked into why this had happened and to my massive surprise, the device had a polyphony of 'around 20'. Which means if you trigger a backing track and do less than a seconds buzz roll, then you might (probably) come unstuck.

But what if you don't trigger backing tracks and loops off your kit? Well, you can still have issues. If you've been reading the previous articles (and if not, WHY not? Grrr...!) then a bell might be ringing in the back of your mind somewhere that this cropped up before.

On the article about Threshold (the level below which pad hits are ignored), then I mentioned how having your threshold set wrongly could be using causing your kit to sound strange. This is because, if the threshold is set too low, then vibration (through the floor) and crosstalk (from other pads) could be triggering sounds (often so quietly that they cant be heard) causing your module to lose half or more of its polyphony. This could be making your cymbals stop unrealistically or other drums or pads to 'choke' or stop for no obvious reason.

As an example, if your thresholds are set way too low, then a single ride cymbal hit could also be triggering your crash pad and the three toms (because of the vibration through the rack), instantly lowering your polyphony from 64 (say) to 12 (roughly). So less than half a second of buzz roll and your module will be 'note stealing'.

Also, if your 'Reject Time' settings are wrong, then you might be eating into your polyphony as well. We'll look at Reject Time (also known as Mask Time) very soon. But if you have ever been playing constantly on a pad and then suddenly one note is much quieter than the rest (it often seems to happen when triggering big, long tom sounds on wobbly pads), then you possibly need to look at your Reject Time as they might be allowing the vibrations of the pad to steal even more notes than just your playing.

So what can we do? Surely it seems pretty hopeless – our electronics are out to get us!

Well, not really. The reality of it is that the major manufacturers have develop some pretty clever ways of disguising polyphony without it (hopefully) affecting us. These are things like not stealing the first note played but stealing the quietest note playing or the quieter of two similar sounding instruments (after all, can you seriously tell how many times a tom has been hit by only listening to the ringing of the head?). Generally this works fine, but on some occasions things just happen and you wonder why everything has stopped.

What you CAN do is buy gear that has better polyphony than other similar products. That way, at least you'll be able to to trigger a backing track AND demonstrate your sexy buzz roll to the audience of 150,000 at Glastonbury without unnecessary embarrassment.

06 Dynamic Curves

06 Dynamic Curves

Okay, so here's another subject which might initially seem rather boring and inconsequential, but is actually very important for the feel (not sound, importantly) of your electronic kit.

So what we actually mean by a dynamic curve (or velocity curve - same thing)?

Well, if you think about playing an acoustic drum, when you hit quietly, the drum responds quietly too. When you hit hard, the drum is loud. Simple and obvious.

05 Over The Threshold

05 Over The Threshold

I know I mentioned that we'd look at Velocity Curves this month but having had a think about it, it would make much more sense to look at those interestingly named Thresholds.

Thresholds? Ok, so you've probably seen that in your module (although it may be disguised with a different name) but it is actually MUCH more important that most people realise and can get you out of trouble very easily.

04 No pain, no gain, and no edrums

04 No pain, no gain, and no edrums

Well, that's a weird thing to be writing a blog about surely? Gain? Are you sure?

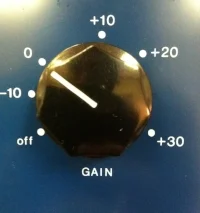
Absolutely. Its one of the most misunderstood things when it comes to electronic drums. Get it wrong and your pads act like switches – hit them and they make a noise at one level. Get it correct and you suddenly have a dynamic, sensitive instrument that begs to be played and is genuinely enjoyable to use.