50 Sounds

This is an issue that has many less experienced electronic drummers a little frustrated – WHERE do you get good sounds from?

That is a totally loaded question, and one I remember spending lots of time trying to solve. However, it is actually pretty easy to sort out, but before you do, you first have to ask yourself WHY you want/need them.

When I first started out using electronic drums I imagined that I would have a collection of samples of EVERY drum, cymbal, percussion instrument and drum machine available. If I was asked for a 'Ludwig Black Beauty' sample, I would be able to reply “Sure, what year? What size? What tuning?” and be able to deliver instantly. I imagined I'd be loading these sounds into a sampler or electronic kit and I'd be famous for have the most extensive sample library in London.

So I put about collecting every available conceivable drum, cymbal and percussion sample I could find. I collected tens of thousands (more?) of drum hits and had them carefully filed on hard drives so I could quickly find loops or single hits ('one shots') of anything that might be asked of me.

However, the simple truth was that I never was asked.

I was expecting that every session I went to, I would be asked for a specific snare sound, or a specific kick sound, or the sounds of a particular set of Zildjian cymbals from 1946 (made on Tuesday 9 October at around 4pm in the Constantinople factory). Except that never happened.

Instead, what I discovered was that as long as you had gear which sounded good (be it acoustic or electronic), it really didn't matter what it was. 

90% of producers wouldn't recognise a rare one piece cocobolo wood snare with custom okapi lapped heads played with a unique tipped stick. They just wanted something that goes 'Bang!' in the right place for the correct length of time. They can sort out everything else. If it sounds electronic when it needs to sound electronic, and acoustic when it needs to sound acoustic, most people don't worry about how it is made.

So my carefully curated sample library (which I still have somewhere) gradually went by the wayside.

Also, I discovered that it doesn't matter WHAT the drum or cymbal is, if it doesn't sound good, it wont be used. The first time I heard a proper TR808 drum machine in the flesh, in the studio, with no processing, hired in at great expense, I remember thinking “Ummm... Is that it? Is there something wrong with this? Is it broken?” as what I was hearing was not what I expected. I think we ended up using something cheap and cheerful instead. 

So... what matters now is all about finding sounds which sound right. Nothing else. And now we have access to infinite amounts of data, we can find everything we want.

So my carefully put together sound library from years ago is now replaced with;

1 - An SSD harddrive with 800GB of Toontrack Superior Drummer Libraries (for acoustic - ie 'real' - drum sounds, they just work and I can tweak anything I need to work)

2 - Addictive Drums as an alternative or for layering

3 - Toontrack's EZdrummer with a load of EZX expansion packs (apparently the most used drum software in Nashville) for a quick and easy, but great sounding, option.

4 - An account with Splice www.splice.com

Splice is an interesting website (and I have no connection to them – I'm just a happy user). It was started (I believe) by one of the companies who used to produce sample CD's (remember them?). As the industry changed, they changed their business model so that for a monthly subscription you can download sounds from their site – the amount depends on your subscription level.

So at its most basic, for $7.99 a month you can download 100 sounds, and those could be ANYTHING – loops, hits, drums, percussion, melodic stuff – it really is up to you. If you don't use up the 100 they roll over so you can have a nice big credit 'in the bank' for those heavy sessions. Best of all, you can keep what you have down loaded when you stop using the site, AND there is no filler, because you only download the stuff you want.

So now I find when I get asked for a 'Booj' sound (Google it) I can just go to Splice, download a few, play them to the client (or me, if I'm the client) and use the one I want. All the sounds are royalty free so you can use them on anything (the Licensing FAQ will tell you everything you need). 

I've used Splice heavily for numerous composing sessions, and I know that Splice sounds have even been used on Eurovision Song Contest entrants. They really are the real deal.

If you want drum sounds, Splice has got them. When I last looked (as I wrote this) there were; 124000 snares over 200 pages, 162000 kicks over 200 pages and 25000 toms over 200 pages. If you cant find what you need there, you need your ears examining.

If you don't want to pay, then look at https://freesound.org which is (unsurprisingly) free. A quick search there reveals 12892 snare hits over 143 pages, 13001 kicks over 229 pages and 5050 toms over 47 pages amongst many other samples. 

But there is LOADS out there if you know where to look. 

Many companies have released free drum sound packages. I've got sample packages from Alesis, and Pearl on a hard drive somewhere, and many magazines or websites will have free content. A quick search has foundhttps://99sounds.org/drum-samples/ and 1000 free drum sounds from Music Radarhttps://www.musicradar.com/news/drums/1000-free-drum-samples . I cant recommend either as I haven't used them, so on your head be it, but they are there...

My favourite place for 'other' real drum sounds (and I'm concerned I'm going to regret this) is the website of a edrum manufacturer. I cant tell you who they are, but their products come in more than one cardboard package (I cant give any more of a clue!). 

Their sampled sounds are in a particular format which can not be used in a standard sampler, module or computer. However, what I discovered years ago was that if you change the extension of the sound file to '.wav' then those sounds become ordinary wav format sound with all the dynamic samples in one file. VERY useful, especially as they are very, VERY good samples indeed.

So, if you know where to look, and what to look for (and more importantly, know why you are looking for it), there is plenty of sample material out there. 

Now you just have to go out and make brilliant music with it all – definitely the hardest part!

49 Moving It All Around

By the sound of it gigs in the UK are (very slowly but) gradually getting back to some form of normality. I hope they are where you are on the planet. Also, by the sound of it, more drummers are taking their electronic kits out than before (could be coincidence) to do the same jobs/gigs that they used an acoustic kit for before the great global lockdown.

There a few very good reasons why this might be happening, from 'many drummers have just got used to playing their electronic kits for such a long period that it has become 'the new norm'' to (my favourite) 'they have actually learnt how to use them properly now and have realised quite how useful they can be'.

I've mentioned most of this stuff before, but if you are going to move your electronic kit around, you need to do it properly so nothing gets damaged. But also it need to be done so it is easy to set up, convenient and quick.

I'm sure we have all seen enough function bands who use electronics setting up to know how not to do it. Theres nothing worse than watching someone at a gig or function build the drumrack from scratch, then take each pad out, put it on the rack, get the module out and put it on the rack and then wire the whole thing up. Not only does it take ages but its not convenient, looks rubbish, plus you just know the drummer hasn't got a backup if anything goes wrong.

If you've ever seen a touring band setting up and breaking down, you'll probably have been impressed with the speed which stuff gets done. Everything gets put into a flightcase, sometimes hardly dismantled, and the whole rig gets wheeled in or out of the trucks in no time at all.

OK, so 99% of us don't have massive flightcases, techs, or trucks to move the gear around in, but we can borrow a few ideas from the big boys. Firstly, why use a drumrack? Its not simpler, or easier to move round, You can use stands to set up the whole kit, just like an acoustic kit, and its much easier to pack away quickly without a large case. If you have the space, get an extra long stands case, just collapse the legs of each stand, remove the booms (all labelled up of course) and you can get the stands away in a couple (literally) of minutes.

As far as the drum pads are concerned, you need to store them on edge as the weight of a pile of pads can damage them. However, cymbal pads need to be stored flat as the edge switches get damaged if stored on the edge. If you do store them on their edges then you need to make sure that the playing area is pointing upwards so theres no pressure on them. 

I recently came across a really good electronic drum case from a rather large retailer based in York (UK readers will probably know who I'm taking about - they sell gear for music). It's a big flat wide case on wheels (like a wide stands bag) has Velcro sections so will take any sized pad. As well as taking a whole kits worth of pads, I could also lay my cymbal pads across the top, put the leads in a pocket and move the whole kit with one hand. It was also very reasonable priced.

But the real time saver comes with the module and all the associated electronics. Lets assume you have your module, and maybe a mini mixer so you can mix your own in ear monitor sound with the foldback (rest of band) and anything else you might need (such as cymbal overheads if you are using real cymbals). Rather than plug everything together and resting it all on a case or box, how about everything is already to go in a small 19” flightcase – you take off the front, pull out the module, take off the back, unravel the cable snake and plug them into the pads, take the top off to reveal the mixer, plug in the mains and the foldback and away you go? Less than five minutes. 

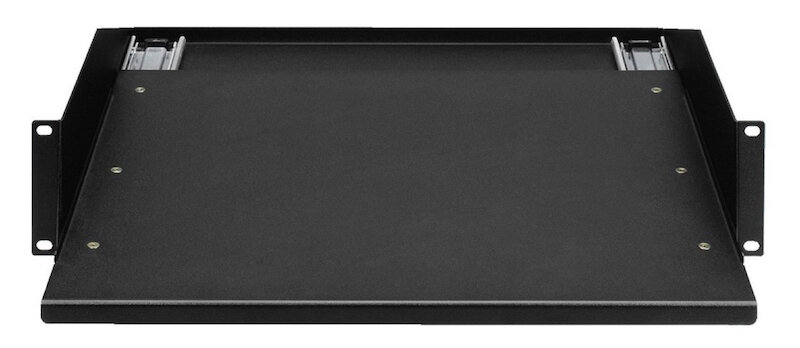
This might sound expensive but it really need not be. Firstly you need a DJ mixer flight case with a removable top, front and back . You install the mixer under the top lid so its ready to go as soon as you remove it. You put your main module on a sliding rack shelf (£30ish off eBay) just under the mixer so you just pull it out (its already all wired in) and turn it on. At the bottom of the case you bolt in a cheap rack mount module like the Alesis D4, DM5, Yamaha TMX or RM50 (all available for around £50 off eBay if you are lucky). This last module is only for backup, so you only need to set one decent sounding kit up just to get you to the end of the gig if the worst comes to the worst and your main module crashes, fails or some other catastrophe. 

As for how you secure your module onto the sliding rack shelf, that is easy too. You have two available methods. If your module is light in weight, some industrial Velcro will do the trick. If your module is heavier, expensive or rare, then drill holes in the rack shelf (if it doesn't have them already) and either bolt it on to the shelf using the bolts that normally hold the module mount on, or use cable ties to secure the module firmly to the shelf. You can easily join cable ties together to make longer ones, so loop them all round the module (making sure they don't get in the way of any button pushing that it required) and the job is good. If the flightcase is tilted in transport (and it will be) your module wont get damaged.

You can cable tie the cables together to make a loose snake and roll this up and leave it in the back of the rack. When I need to set up, I just open the rear door, uncoil the 'snake' and plug it into the pads.

The bit which confuses most people is how to wire up the two modules. This actually couldn't be easier and it uses a patchbay (£30 upwards from eBay) like you'd find in a studio. 

Patchbays have a 'half normalled mode' that allows you to split one input to two outputs. If you connect one set of outputs to your main module and the other set to the second 'backup' module, you will be able to trigger both at the same time from one pad input. Then, if your main module dies, mid gig, you just raise the volume of the second module, turn down the main module, and you carry on. Simple and it takes under five seconds to change.

So thats it. Apply a little thought and make your life easier. It doesn't have to be hard.

48 What's That Hum?

Just a quick one this month, but one which regularly crops up, and will do for as long as we use electronic drums.

Every so often, I get a call from someone saying “My module's making a really loud hum/crackling/buzz. It's all over the outputs and I need to gig/record. What can I do?” or words to that effect.

So theres three main things which make electronic devices like drum modules hum or make unwanted noises (there's probably loads, but these are the first three I look for). Lets have a look at them in turn;

Problem - Dirty mains power

This is, thankfully, less common now, but if you're on tour somewhere obscure (Eastern Europe used to be GREAT fun, electrically) and it looks like the electrics have not been looked at for 20 years, this is one to consider.

Electricity moves around building through the electricity cabling (obviously), but sometimes, one of the products which is plugged into the mains develops a fault (anything from a fridge to a bulb) and it arcs (or sparks) internally. This arc-ing sends crackles, buzz, pops or other horrible noise through the mains cables, and depending on your electronic device, can cause audio devices to duplicate the noise at their outputs. Fridges, when they turn their pumps on and off, are great generators of mains clicks too.

If you cant find the device responsible, and turn it off or unplug it, then you need to isolate your device from the mains, but still use the power. 

Cure - To do this you need a mains isolation transformer. This is a (heavy) box which plugs into the mains at one end, and has a socket on the other. You plug your gear into the socket, and through the wonders of transformers (magnets, loads of wire wrapped around them etc) the power gets through, but the noise doesn't. Job done. 

In the UK you can get 230/230v Transformers for under £100 from places like Screwfix. They are heavy as I mentioned, but they can be very useful in times of need. However, of course you're all doing big tours with massive crews, so clean power is one of the first things to be sorted.

Problem - Dodgy PSU's

The PSU is the power adaptor that we often have to plug into the wall and then plug the thin cable into the backs of our modules. These are step down transformers, so 230V goes in one end (USA – 110V, Japan – 100V etc) and a nice clean 9V, or whatever your module needs, comes out the other.

A simple transformer looks like this inside;

The two magnets are attracted to each other and the amount of coils of wire wound round each side determines what the output power will be. Very simple, very effective.

Except sometimes, the magnets start to vibrate against each other. This makes a constant hum, and that can cause some devices to also hum at the same pitch.

While this can be sometimes stopped by tapping the transformer (not recommended), it actually means that the transformer is on its way out and should be replaced ASAP. 

Cure – get a new PSU for your device. Or rather, reach in your bag and pull out your spare, because of COURSE you carry a spare don't you?! For the cost of a few drinks, its worth always carrying that spare! (I know, I know, generally we don't carry one, but you only have to experience a PSU failing once on stage to make sure there is always one close by)

Problem – Unplugged cable 

This might seems really obvious, but it happens all the time. Loads of people use a cable to plug a phone or other device into the Aux In on their modules, then unplug the phone when they turn off, and then forget the cable, still plugged into the Aux In, but not plugged into anything at the other end.

When they next turn the module on, the unconnected wire causes a loud hum as it's 'open circuit' – there is nothing for it to earth/connect to. Cue much wasted time, trying to find out what the cause of the problem is, when it is usually staring them in the face.

Cure – if your module is humming, unplug any cable going to an input (Aux In etc). Easy.

However, electricity is dangerous stuff, so if in doubt consult an electrician. Your life depends on it... literally. 

47 Midi Confusion

Most people are familiar with the concept of MIDI now, but there still confusion about when is a computer needed, and which direction does the data travel, so lets have a quick look. Again, this is the subject because of something that happened in the last couple of weeks, and after sorting it out I realised that quite a few people were having the same issue... so here we go!

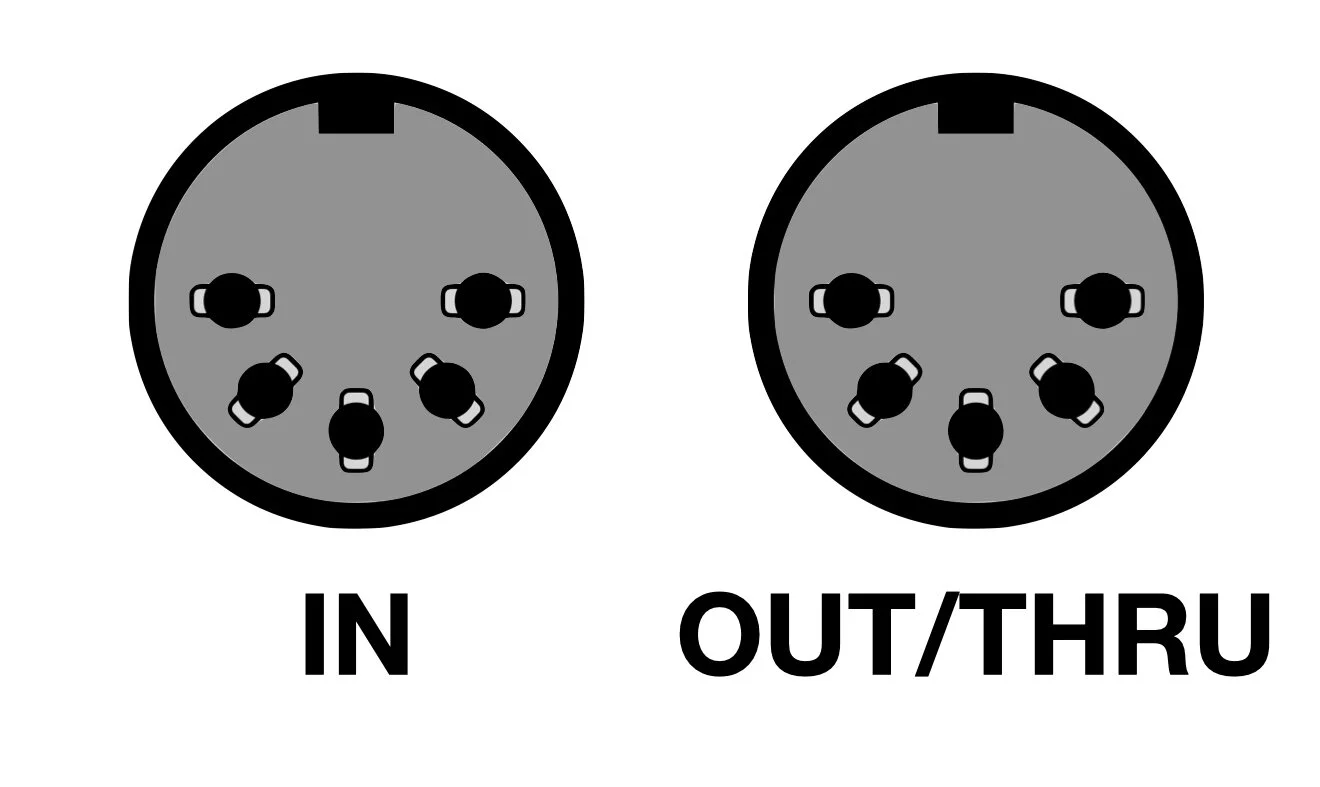
Originally back in the early 1980's when MIDI first appeared, all 'MIDI gear' had two, or three, 5 pin MIDI sockets (sometimes called 5 pin DIN). One was labelled OUT, one labelled IN and occasionally (if you had expensive gear or it required it) one labelled THRU. MIDI cables are mono directional (data only goes one way) so it was nice and logical – you could follow the MIDI path by following the connections from OUT to IN.

You connected the OUT of one piece of gear (the master) to the IN on another (the slave) and then whatever was sending MIDI data from their OUT socket (the master) had control of the one connected by the IN socket (the slave). Simple (why can we not, in the UK at least, not read the word 'Simple' without hearing it in a Russian accent and thinking of Meerkats? Advertising has a lot to answer for!).

The THRU socket mirrored whatever was coming into the IN socket, so if you wanted to chain a load of gear together, you connected the THRU of the first slave to the IN of another device (2nd slave) and the master controlled the 2 slaves. Any note played on the master was duplicated on the slaves. You could theoretically chain loads of devices together and pressing one key on the master device would make ALL of the slaves play the same note – cue massive 80's keyboard sounds!

Over time the THRU socket disappeared as manufacturers realised they could save on money, and use the OUT socket as a THRU as well – switchable internally. I've just had a look around my studio and I have found I don't own a single device with a dedicated THRU socket.

All was good in the land of MIDI until musicians started using computers. Initially, we would connect our MIDI gear to our computer using a dedicated MIDI interface. As we often needed to use both IN and OUT then there was a lot of cabling hanging off the back of the devices.

So some smart person decided that when computers were involved it made more sense to use a single cable. As USB was a sexy new (back then) connection, it was decided that we would have USB MIDI – a single lead which is bidirectional (data travels both ways so no more IN and OUT) and it would link out devices to out computers.

This was all good, but over time manufacturers decided to leave off the IN and OUT sockets – after all, we were all working with computers, right? - and MIDI sockets were seen as dated and old fashioned – we had sexy USB now!!

And most of the time, this is fine. But what happens if you had a device with only USB MIDI on it and you wanted to link it to another device with only USB MIDI on it? The only way (for a while), was to use a computer. 

You see USB MIDI needs a Host device. One 'end' has to take charge, unlike standard MIDI cables. Its all to do with the fact that they are bidirectional and require a timing clock – something needs to be overseeing this and a computer is perfect – it has a clock and can process different data simultaneously.

But if you want to connect a drum module with just USB and a sampler, also with just USB, you need to go via a computer, which sort of defeats the object if you are trying to cut down on excessive gear. 

So later a small UK company called Kenton, who make useful little MIDI devices, came out with their USB MIDI Host box (which is now on it's MK3 iteration). This is a device which converts USB MIDI into 5 pin socket MIDI and vice versa. And no, I'm not connected with them, but for the amount of business I have probably put their way, I wish I had shares.

These have been complete life savers for me over the years and they have allowed me to connect almost everything to everything else. (I say 'almost' as some devices which act as a USB hub - I'm looking at you ATV aD5 module - wont connect to the Kenton; they have to go to a computer)

So you don't need to go via a computer now and your drum module which only has USB MIDI can now happily talk to your vintage sampler with it's 5 pin MIDI IN socket.

Totally.

Brilliant.

So there you have it. MIDI, and USB MIDI is generally pretty simple, but hopefully this may have ironed out some rough patches.

46 Common Problems

Back to technique this month.

Much as I'd love to see these issues go away, a quick look at various social media platforms is enough to show they haven't... yet.

So I thought I'd look at these 2 really common issues, and hopefully explain not just how to solve them, but actually why they are an issue.

1. “When I hit my pad hard, it doesn't trigger all the time. It works fine when I play it quietly. Is my pad broken?”

Firstly, the chances are that the pad is fine. 

Usually, when this happens, it is caused by the gain of the pad being too high. What this means is that the module is amplifying the trigger signal from the pad too much – so much in fact that the module cant read the how big the signal is. It doesn't know if you have hit the pad really hard or really lightly.

The signal from the pad is like a fading 'wobble'. When you hit the pad, the module looks at how big the largest part of the 'wobble' is and uses that to make a decision about how loud the sound you want should be. If its a small 'wobble' then its a quiet sound. If its a big 'wobble' then its a loud sound.

Imagine the part of the module that looks at how loud the sound (the pad input) is a door, 2m high. The signal (wobble) from the pad is a wave of water coming though the door. If the wave is smaller than 2m high, it is easy to see the shape of the wave, and to work out how tall it is. 

However, if the wave is larger than 2m high, the top of the wave will get chopped off as it goes through the door. Then, from the inside, it wont look like a wave anymore, more like just a blast of water. From the inside it would be impossible to work out the shape of the wave, and also how big it was before it came through the door.

So the drum module cant work out what just came through the door, but it might see some of the smaller 'waves' coming after, so it ignores the bit it didn't understand, and just plays a quiet sound instead.

So the solution to this is simple – turn down the gain, or 'sensitivity' so that if you hit your pad really hard, it never gets bigger than the door. 

2. “Hitting my snare pad hard makes my tom pad trigger quietly. I've turned up all the Crosstalk settings to full and now nothing triggers correctly.”

Firstly, don't mess with Crosstalk settings unless you REALLY need to. I know it seems like an obvious thing to do, but as in the example here, it can mess up other stuff. 

So first, put the Crosstalk settings back to where they were.

Crosstalk settings also slow down how fast the module reacts as turning them on means the module has to look at all the inputs, analyse them, and work out what was an actual hit and what what probably vibration through a stand or the floor.

The answer is much simpler. “Crosstalk” is when vibration from you hitting one pad travels through the rack or stands, or through the floor, and makes other pads think they have been hit very lightly, and makes them trigger quietly, even though you are not hitting them.

Threshold is the level at which everything starts to be interesting for the module. Any signal which is quieter than the threshold (or Minimum Level if you use Yamaha gear) is ignored. Anything above it is treated as a legitimate trigger signal.

If you raise the threshold on the pad which is being accidentally triggered so the crosstalk, or vibration, from the pad you are hitting is smaller than the Threshold level, then the problem will stop.

Hopefully thats a bit clearer. Get in touch if you thinks there are some other classic problems which need looking at.

Why iTunes Doesn't Work With The Yamaha EAD-10 Properly Anymore

The EAD Launch

When Yamaha released the EAD 10 in November 2017, there was nothing else like it. As well as being able to record the sound of a whole drum kit with just one box, it also showed the world a new app called Rec'n'share.

Rec'n'share was unique, and still is, and allowed drummers to use songs in their music library, stored on their phones, play along with them and record themselves, and also film videos as well. It was totally radical.

For drummers who wanted to make YouTube drumming videos it was absolutely perfect.

Apple iTunes was the perfect source of music. iPhone users could buy any tracks they wanted, they were stored on their phones, and because they had bought them they had a right to use them in the Rec'n'share app.

For a few years, everything went perfectly.

Enter Apple Music 

Then in 2019 Apple decided to end iTunes and move everyone to Apple Music. This was something totally different and unfortunately was the start of problems for EAD users who used iTunes for their music.

iTunes worked because the users bought the tracks. Apple Music is actually a streaming site (meaning the tracks are not stored on your phone but are stored on the Apple servers and are fed through to be played on your phone). So all those tracks that you used to listen to on your iTunes account, are not on your phone anymore and are now streamed from the Apple servers. 

Apple’s reasoning for this was that some users had their phones completely full of music, but if they moved over to Apple Music, all that space which was being used for music, could be freed up and all music, if it was streamed, would take no space on their phone.

Why this is a problem

Legally, this became a bit of an issue. The EAD was heavily linked with iTunes and that worked OK legally, because iTunes users had paid for their tracks. In effect they 'owned' them.

However, with a streaming site such as Apple Music, the users do not own the tracks, they are merely 'borrowing' them from Apple to listen to, and they are not storing them on their phone, and they have not paid for them.

This was against the licensing agreement for Rec'n'share and any other device and apps (of which there are many) which allowed people to use their music files.

So overnight, people found they could not use their EAD10 with iTunes anymore.

This is where it gets a little bit hazy. Some users reported not being able to use iTunes at all, some reported that they could use some tracks but not all, and some people had full access to all their tracks as though nothing had changed.

If users signed up for Apple Music then they instantly lost the ability for Rec'n'share to access all the tracks they had previously purchased in iTunes. 

So all the issues with EAD10 and Rec'n'share were actually not caused by Yamaha, but were caused by Apple discontinuing iTunes. Yes, there might still be an iTunes icon on your phone (if you haven't updated for a long time) but when it can, your iPhone is streaming tracks from the Apple Music servers rather than playing tracks which are held on your phone. You now don't own all those tracks you bought IF they can be found on the Apple servers.

The reason it doesn't work anymore

Importantly, the reason for this is very simple. If you were able to stream any track you wanted from Apple Music onto Rec'n'share, you could “forget” to play drums over the top and then you would have a perfect, hard copy of that track on your phone for you to do with whatever you wanted. In effect it would promote music piracy, which is exactly what all the record companies do not want. THIS is why it does not work anymore.

How to do it now

So if you want to use Rec'n'share in the traditional way, you now have to use Dropbox (or iCloud but I would recommend Dropbox as it is totally cross platform).

Create a Dropbox account (which is free) @ www.dropbox.com 

Inside your Dropbox you need to create a folder and call it something like 'Rec'n'share' or 'EAD10'. 

Into that file you need to put all the tracks that you might want to play along with on your EAD 10. The great thing about Dropbox is you can do this from any device – phone, PC, Mac etc

Go to the Rec'n'share app on your device and you link it with your Dropbox account. Touch the area where the name of the song is shown – top left of the screen. Press Local Songs, press Copy From Dropbox and follow the instructions.

Then need to find your EAD10/Dropbox folder and inside will be all the tracks you have put in there. You'll be able to use these so you can play along with them, and record yourself playing with them, and also film yourself with them.

Sorry this is such a long answer but that is the reason. It’s not a Yamaha problem, it’s a legal problem caused by Apple discontinuing iTunes, and this is why you have to now use Dropbox or iCloud if you want to play along with your song collection.

Simon Edgoose

45 Centre Cone / Edge Cone

If you follow the changes in the electronic drum world, you'll probably have noticed the change in mesh head pads over the last few years.

Since the TD10, mesh head pads with centre cones have been 'the thing', the 'one to beat' and other 'sincere' marketing phrases. Even the original woven mesh head electronic pad – the Pollard Syndrum in 1976 – had a central pickup, just it wasn't a foam cone back then.

If you are unfamiliar with what we are talking about here, very quickly, drum pads with mesh (woven nylon or Mylar thread) drum heads for electronic drum kits usually have a small foam cone, just pressing against the under side of the centre of the mesh head. These foam cones pick up the vibration of the head being hit, and the vibration is passed down to a piezo pickup, where it is converted to a voltage and sent to the drum module to trigger a sound.

centre cone edge cone PICS.001.jpeg

The only thing with the centre cone construction is that it actually isn't very good. The location of the cone under the very centre of the head means that there is a massive 'hot spot' in the dead centre of the pad, meaning any hits which dead centre will be met with a massive trigger spike and an extra loud sound. Not very realistic. And we drummers usually play around the dead centre of our pads/acoustic drums.

To compensate for the hot spot, manufacturers would try one of two things. The first was to recognise that the hit was dead centre (by analysing the waveform of the hit – see later) and attempting to adjust the volume accordingly, not always successfully. The second was to turn up the overall pad sensitivity so that any hits, anywhere over the whole centre of the head just massively overloaded the trigger input of the module – the centre spot could not 'hot spot' because it just couldn't physically get any louder. This method (the easiest one to do) meant that centre cone pads generally had little dynamic range in the centre of the pad, so most users got used to playing away from the centre, just for a bit of variation. Again, not very realistic.

The other thing about centre cone construction is, that as it is just the tip of the cone touching the head, the sensitivity of hits further away drop off pretty quickly, unless it is compensated for electronically. Mesh, as I have mentioned quite a few times before, is pretty rubbish at passing vibration through itself (the weave allows vibration to dissipate very easily) so centre cone pads tend to not trigger too well towards the edge.

One of the main reasons that manufacturers stuck with the centre cone construction was for positional sensing. This (in case you don't know) is when a module or software triggers position correct sounds depending on where on the drum head surface it has been played – when you play in the centre, it sounds like you are playing in the centre with a drier, crisper sound, and when you play at the edge it has more ring, with more harmonics and less attack. 

Positional sensing was originally done by ddrum on their ddrum3 kit in 1993. The module analysed the waveform of the hit and looked at the angle of attack of the waveform – the shallower the angle, the further away the hot was from the centre. All very simple, and great for listening to drums in isolation, but not really noticeable on big stages. To be blunt, positional sensing is more for bedroom players (and those making YouTube videos of course!). On big stages and in your average track mix, you just aren't going to hear any difference it makes.

So the centre cone pad ruled for many years.

Then in 2017 ATV bought out their rather good aDrum kit with it's aD5 module – it looked like a drum kit, it sounded like a drum kit, it played like a drum kit (with really great dynamics) but most importantly, it didn't have hot spots in the centre of the heads. 

This was because ATV (who were mostly ex Roland engineers anyway) built the kit they always wanted to build, and correct things that they thought needed to be changed. So they used 3 edge cones to pick up the vibration on the heads. And these have a distinct advantage over centre cones.

With 3 edge cone construction, the wonders of maths come into play. When you play in the centre of the head, the vibration is being picked up equally by all three cones, which are equally spaced (120 degrees apart) around the head. As you move away from the centre of the head, you move away from one cone (so the volume output goes down at that point) but towards the other 2 cones (whose output goes up). Therefore, edge cone pads have a MUCH larger area of sensitivity, and are much more consistent. 

The other advantage of edge cone pads to centre cone pads is that with centre cone pads, the vibration can occasionally cancel itself out. Imagine throwing a stone in the dead centre of a perfectly round pond. The vibrations spread out, hit the edge and then come back towards the centre. When they meet, again, dead centre, if they are perfectly timed, one ripple might be going up, and one is going down, and these will cancel each other out to zero. Exactly the same can happen with centre cone pads (more usually with Mylar heads rather than mesh, but it does happen).If you have used centre cone pads, you might have experienced total drop outs which were not caused by other trigger settings. 

Edge cone pads don't do this, as any hit will get to the three cones at different times, and as there are 3 of them, even if one vibration is going up (positive) and one is going down (negative) and these two cones cancel each other out, there is always a third to provide more trigger information. 

Edge cone pads aren't perfect – they still have hot spots, at the edge over the cones - but as we play less right at the edge, and MUCH more in the middle, these are noticed less. 

And lastly, edge cone systems can also generate positional sensing data – just the opposite way around to centre cone systems. With centre cone systems, the shallower the angle of attack of the waveform, the further towards the edge, and further away from the piezo the hit was. With edge cone systems, its just the opposite - the shallower the angle of attack of the waveform, the further towards the centre, and further away from the piezo, the hit was. It just needs the module to react in the opposite way.

So, the centre cone mesh pad is dead – long live the edge cone pad!

Simon Edgoose

44 Better Mesh Bass Drums

When trying electronic kits, the one instrument that indicates, to me, how much time has been spent on the overall feel of it, is the bass drum. Some you just sit down at and go “That's nice!” whereas others you sit down and go “thousand pounds and it feels like that? No thanks!”

I've also been luck enough to be able to take some of these bass drum pads apart and try and work out what makes then feel so good (or bad).

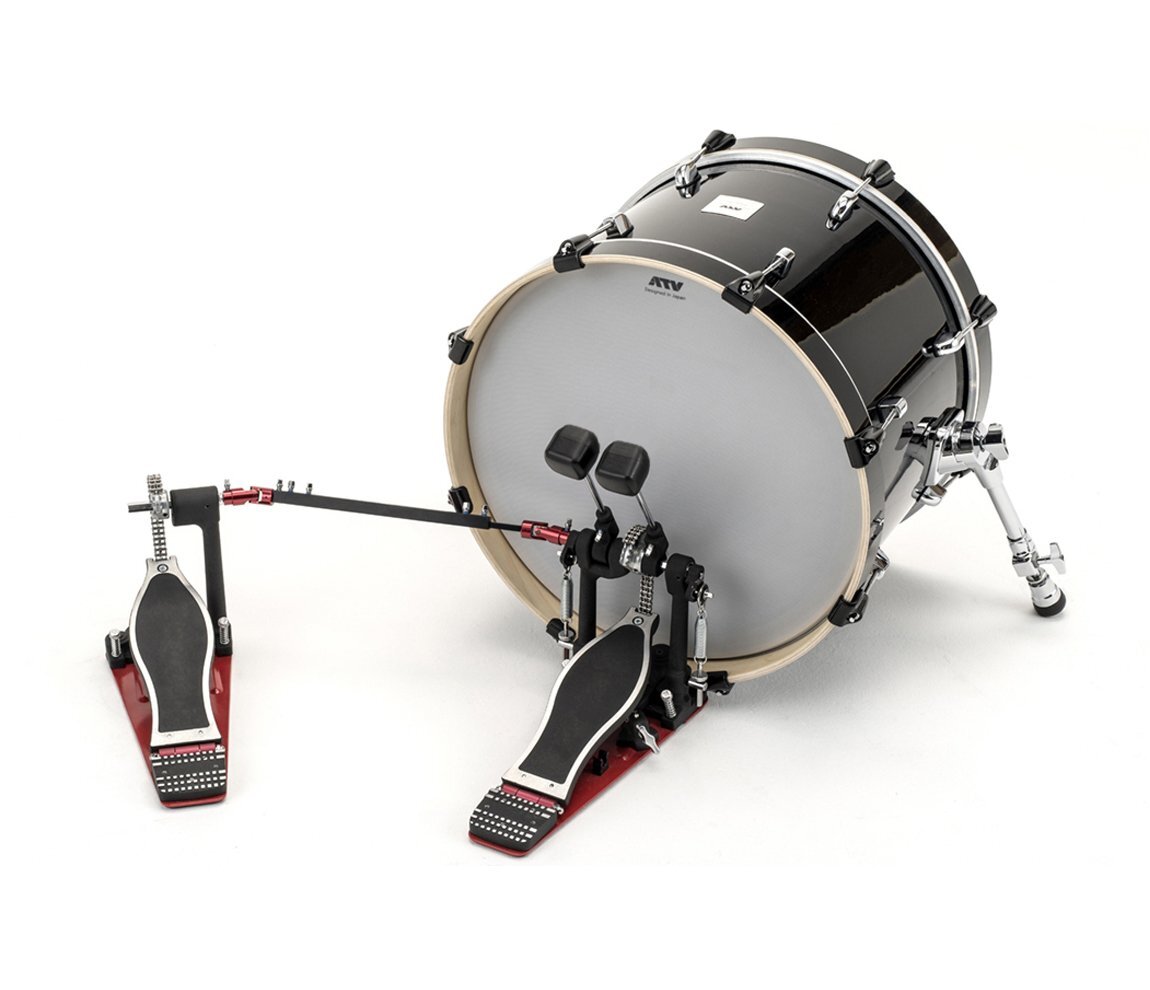
To me, currently, the ATV aDrum 18” bass drum pad and the Pearl eMerge 18” bass drum pads feel pretty damn good. Both work on, sort of, the same principal – a mesh head with 'something' behind. 

In the case of the Pearl, the 'something' is a leather type material pad over firm foam, just where the beater hits. The foam feels good, and I suppose the mesh head is just there for aesthetics, but overall, the package is good.

With the ATV, the 'something' is a large, full head size piece of foam behind the mesh head, but interestingly, it has a hole cutout behind where the beaters would hit. It's the contrast from the foam to the 'hole' that makes it feel, in my opinion, so good.

As we all know, just a mesh head on a bass drum feels pretty horrible. It needs something else to make it feel more 'real' or solid. I normally suggest filling the bass drum with pillows up to a height just below the beater hit point, but pillows can move around, add weight, and they can look a little weird in that Harry Potter pillow case your mother bought you when you were little.

So, as so many people are using A2E kits, I thought I'd try and replicate (to the best of my abilities, and without spending loads) the feel of the ATV kick, so it could be applied to other bass drums of any size. 

The foam in the ATV looks something like this (below), and it looks nice and 'factory fitted' but in my opinion, the foam filling the top half of the head (ie the bit around the hole) is just there for aesthetic reasons. They even have a patent on it.

I have a 16” bass drum which I use just for triggering, so I thought that would be the ideal subject to try and improve the feel of. I could have bought a 15” circle of foam and some brackets and copied the ATV pattern exactly, but I wanted to see if there was something easier. And there was.

I found on Ebay a seller who sold foam for cushions. They sold 2” thick upholstery foam in discs, in pretty much any size, so for £15 I ordered a 15” diameter, 2” thick piece of foam in a medium density. 

When it arrived, I cut it in two, exactly down the middle (the trickiest part of the whole mission – use a bread knife and measure, measure, measure before you cut), so when stacked, they made a 15” semicircle of foam, 4” thick. 

To hold the foam in place, I used some brackets which I've had kicking around for ages. These have a slot down one side, so they are adjustable, and I removed the screws from the back of the lugs from 3 o'clock around to 9 o'clock and put the sliding slot behind them before tightening everything up again. 

2021-05-30 15.44.06-1.jpg

Then I put the foam in the drum, supported by the brackets, and adjusted the brackets so the foam stuck out about a centimetre in front of the bearing edge. This put a bit of pressure on the head and improved the feel.

2021-05-15 13.20.08.jpg

Then I put the mesh head back on and tightened it to a comfortable playing tension. 

And that was it – a £15 piece of foam, 4 adjustable brackets (a few pounds off eBay again) and the feel was much, much improved. I wouldn't say it is as good as the ATV, but then it was a fraction of the price, but, importantly, I can easily repeat it, and use it on any size bass drum. 

2021-05-15 13.20.23.jpg

The same eBay seller sells foam discs in 15 (for a 16” head), 17”, 19” and 21” sizes, so as long as you don't rock a John Bonham sized kit, you too can easily get a foam disc to suit your bass drum. As you'll have guessed by now, you'll need a foam disc, 1” smaller than the head size of your bass drum.

If you try it and feel it is not 'solid' enough for you, simply cut a semicircle out of board (MDF or whatever is to hand) the same size as the foam, and put it behind it, supported by the brackets. This will add pressure across the whole head and make the whole thing much more solid.

So there you have it. Do you have an A2E bass drum and you're not happy with the bass drum feel? Try this – cheap, fully adjustable, and takes about 15 minutes to do.

Simon Edgoose

43 A2E Improvements

Rather than fork out on a big acoustic looking electronic kit, you might be one of the many who has invested in an A2E conversion kit. If you are unfamiliar with the term A2E, it means Acoustic to Electronic, meaning you take an acoustic kit, stick mesh heads on it, use triggers and electronic cymbal pads, and there you have it – an electronic kit which looks like an acoustic.

The idea for this has been around for decades – I remember seeing an acoustic kit with ddrum pads hidden inside the shells back when I was a kid – but the idea has become more popular over the last 10 years or so.

If you are considering going down this route, then there are a few things to consider – firstly, it doesn't matter how good or bad the shells are. As they will have no acoustic impact on the sound, they can be ultra cheap or whatever you have to hand. 

If you are intending on gigging it, then looks are important, but if it is for home use only, then a £50/$50/€50 kit from Gumtree/Craigs List/eBay/Kijiji etc will do the job.

Except it wont...

...because we drummer are fussy about things like that, so it has to look at least half decent. But if we weren't so insecure... then the £50/$50/€50 kit would do!

I wont talk about mesh heads as I spent ages on it here http://mikedolbear.com/seriously-wired/not-all-heads-are-the-same/ and here http://mikedolbear.com/seriously-wired/mesh-again/ but lets just mention something that is rarely written about;

Mesh heads can seriously damage bearing edges.

Yes, as you hit your mesh head, each strand that is at right-angles to the bearing edge acts like a little saw and will cut grooves into your edges over time. The cheaper the drum, the softer the wood, the quicker the damage. I use a nice Yamaha Birch Custom Absolute kit as my teaching kit, complete with mesh heads and triggers, and the last time I changed heads, I was shocked by how much damage the mesh heads had done to the edges.

So, what can you do? Well, the easiest thing is to buy some rubber U-channel, like the stuff you put on your rims to cut down the noise of you accidentally hitting it (the official term is 'rim condom' I believe), cut it to length, and put that over your bearing edges, under the mesh heads. Not only does this protect your edges, but it also (as I discovered on a project some year ago) dampens the mesh head, cleans up the trigger signal, and so improves the triggering overall.

Then we come to triggers, and you can either go with internal or external triggers. Now, I know the idea of internal triggers are very popular (especially in the world of bedroom players), but in the serious world or touring drummers (which lets face it is surely the pinnacle of what most drummers want to do) internal triggers don't get a look in. This is because, if anything goes wrong, you cant get to the trigger without removing a head – sure, it looks nice, but practically its a pain. 

I know at this point that some people will be shouting 'Yes, but you can't get positional sensing from an edge trigger'. 

Well, maybe not (give it time...) but if you are playing the Royal Albert Hall/ Shea Stadium/ Budokan and any audience member can hear your positional sensing, I'll buy you breakfast for a year. 

So while, PS is not pointless, its not really something to worry about when you look at the big picture.

So external triggers work great for live – if one breaks, just slap on another and transfer the trigger cable. You can even leave the trigger on when you put them in their cases - I did a whole tour without touching the triggers – just remember to place a firm block of foam on the top head with a cut out for the trigger so that if they are stacked the pressure isn't taken by the trigger. 

So to sum up (and we WILL come back to this);

  1. Any kit will do, but sometimes, looks are important

  2. It doesn't need to be expensive

  3. Cover the bearing edges to protect them from the mesh heads

  4. If you're using the kit live, use external triggers incase anything breaks

  5. Positional sensing is not important live

  6. Leave the triggers on, but protect them in the cases

Fabulous. Here's to next time.

Simon Edgoose

42 One Kick For All Seasons

If you've been in the lucky position of recording with a band, then you'll be aware of the expression “It's being mixed...” often followed by “...we'll get if back in a week” or some such longish time schedule.

The art of mixing records truly is an art. It's not easy to take 30, 40, 50 or more tracks and mould them into something which sounds like a hit record (or if not a hit record, at least something to be proud of). Its no surprise that it takes time.

So I was rather intrigued when I read about a book by a certain Billy Decker. Billy is a record mixer who works mainly in Nashville. What makes Billy stand out from the crowd is the fact that he mixes most of his records in 45 minutes or so. Yes, 45 minutes, not 45 hours, or even 45 days.

Billy Decker.jpeg

Now, when I first read this, I was ready to call BS, but on closer inspection, this is exactly what he does (he even mixed 7 singles in one day apparently). He's no small time wheeler-dealer either – his mixes have appeared on 50 million albums and billions (literally) of streams, and he's mixed 16 Billboard number 1's. Check out his AllMusic page here https://www.allmusic.com/artist/billy-decker-mn0002570782

He REALLY knows his stuff.

How does he do this? Well, after years of mixing, he realised that he generally did the same things with the same instruments, so rather than set everything up from scratch at the start of each mix, he created a template which does most of the work for him, and he just drops the tracks into his template and he's 90% or more of the way there. The rest is just small tweaks.

This means that he has set up the EQ and the compression and any other effects already, and everything just gels together and gives him a radio ready mix. Easy.

I should point out here that Billy does most of his work in the country music field, which you might think explains how he does it (“We play BOTH types of music here – Country and Western!”), but he's done more pop chart orientated stuff too. He's not a 'one trick pony'.

So what has this to do with edrums?

Well, Billy has a few interesting ideas when it comes to drums. Two which spring to mind are - he NEVER uses the original kick drum that he is supplied with, and he EQ's the toms the same, regardless of what they are, how many there are etc. He also uses a LOT of drum replacement software but thats another story... sort of.

Now, I wondered if I could use some of Billy's ideas for my programming and work on edrums, and I have started to use them, and they work brilliantly, but there's one I wanted to look at here.

As I mentioned above, Billy doesn't use the original kick drum on any recordings that he is send to mix. This is because, why spend 45 minutes EQ'ing and tweaking the sound which was supplied so it fits the track, when you can use something else and take 45 seconds?

What Billy does is extract the performance from the recording, using drum replacement software, and then trigger three bass drum audio samples all simultaneously. One sample is mostly low end, one is mostly mid range, and one is mostly the high end. Each sound is pre-EQ'd (Billy provides the EQ settings in the book) so they 'fit' together. 

And simply by adjusting the mix of these three samples, he can come up with a kick sound almost instantly which fits the track.

So I tried it.

And it works... really well.

Obviously I'm simplifying things a bit (and I really recommend any musician to read Billy's book – Template Mixing and Mastering by Billy Decker and Simon Taylor, available as a book or on Kindle), but it is as simple as that.

Obviously you need to choose your samples really well, and Billy cleverly doesn't tell you what he uses, or provide examples, so you have to work it out yourself, but as a drummer, if I cant pick three kick samples which work together, then my ears are shot. 

(Yes, with an 'o'...)

I don't know if I was just lucky, but following Billy instructions, I carefully chose three samples, and just by adjusting the amounts of each one, I can go from an ultra electronic kick, to a dance kick, to a John Bonham kick, just by turning three knobs (virtually or on a USB pad controller). 

But what is more impressive is the variation I can dial in – Bonham with a bit more attack, thuddy 1980's Recording Custom through a D112, hard dance kick which makers the speakers really pop, and so on. It's brilliant!
The only time I need to make changes to the basic recipe is when I need it to sound like a much smaller bass drum, like an 18” bop kick, and then I just pitch up the lowest sample (which is a ringy, open acoustic kick sound) and it's done.

I don't do much mixing – just the tracks I use for demo's and other things I get send to work on, but this has really helped. 

It also means that I will be able to trigger a kick sound live (when the gigs start again) and always be able to dial in the sound so it suits the PA perfectly, without having to let someone else mess about with it.

This book really has been a revelation. If you are at all interested in recorded drum sounds, then I really recommend you check it out. 

And this is just the start. You need to also check out his ideas for mixing snares (again using three samples – low, mid and high – but this time blended with the original snare) and the previously mentioned tom EQ setting (again, so simple, but it really works).

This book could make getting your live or recorded drum sound as easy as 1,2,3. I'm not saying you'll be the next Bob Clearmountain in a week, but it'll definitely be a start.

Thoroughly recommended.

Simon Edgoose